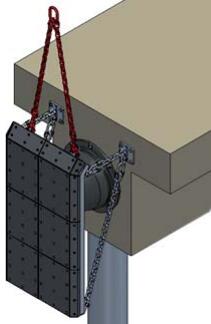
It is essential that the anchor bolts are accurately located prior to installation. There are there main types of installation:
1 New concrete with cast in anchors
2 Steel structures with bolted connections
3 Existing concrete with resin anchors
Whichever type of installation you have, an anchor bolt template will be the most accurate method of locating anchors either in groups or combination. A template should be requested at the time of order enquiry.
1.Chain plate attachment
Prior to installing the cone fender, it is advisable that the ancillary components such as chains and brackets are installed. This will make final adjustments to chains easier whilst the crane is supporting the weight of the fender.
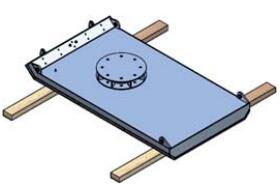
2.Preparation of panel
Prior to unloading of the cone rubber fender components, it is advisable to prepare a suitable hard, flat surface to lay out the fender steel panel. Fender steel panel can take up quite a large area and it is worth considering this beforehand to allow access for cranes and personnel.
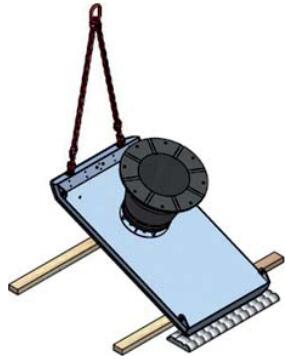
It is preferable to lay the fender steel panel face down and on timber battens as this will prevent scuffing of the fender pads and keep the panel clean.
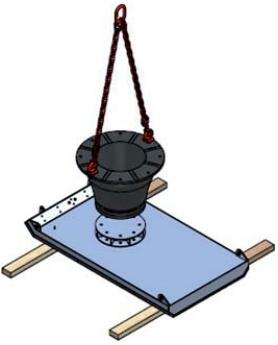
3.Cone fender body attachment
The cone rubber fender body shall be lifted by attaching two eye bolts to mounting holes and then lifting by means of a 2 legged sling. Care should be taken not to damage or cut the surface of the rubber with any sharp objects during assembly and installation.
The cone rubber fender should then be lifted and located on the mounting holes on the back of the panel and then bolted into position. The bolts for holding the cone should not be over tightened or even tightened to a specific torque. As a rule of thumb the washer should not bed into the rubber by more than 1-2mm.
4.Chain attachment for lifting
Once the cone fender bodies have been fitted, a 2-legged sling can then be used to lift the fender. The fender steel panel will either have purpose made lifting lugs or upper tension chain lugs can also be used. It is advisable that shackles are used in the lugs prior to connecting the sling.
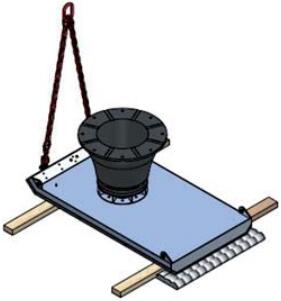
5. Lifting of panel
The first operation prior to lifting will be to lift the top end of the panel and tilt it around a soft fabric type material. This should be situated along the bottom edge to prevent damage to the paint. Once the fender steel panel is upright you can then lift it away and slue into position.
6. Panel attachment
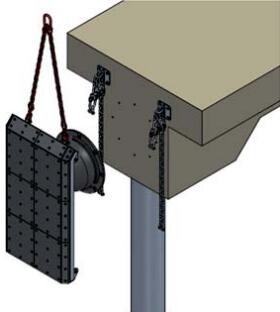
Before attachment of the cone fender, always ensure that adequate and safe access has been provided for all instances including inter tidal. Care should be taken hen lifting the fender into position to avoid damage to the paint and rubber.
7. Complete installation
When the bolt holes have been aligned ,it is advisable to loosely screw in each bolts using the carne to adjust fine movements. When all bolts are positioned, tighten them in sequence diametrically about the flanges.
It is recommended that the carne should support the fender weight prior to fitting of the fender chains as this will avoid the rubber drooping and will make it easier to tension the chain adjusters. When the chains have been tensioned the lifting sling may be removed.
